Salesforce made Flow Tests available first as beta in Summer 22 and generally available in the Winter 23 release. However, ever since that launch, it looks like Salesforce didn’t do enough to make this very useful. While Salesforce created documentation on the considerations/limitations for testing with flows 11, this doc does not go far enough to tell you the real problems you will hit.
One general important concept with testing is the ability to be integrated into a CI/CD process. That way you can repeatedly run those tests before/after each deployment, across multiple environments, scratch orgs, etc. None of that is possible (yet?), those tests can only be triggered through the Flow Salesforce UI, which defeats one of the major reason to use them. (Vote on IdeaExchange if you think It’d be useful!).
It is also impossible to measure your % of test coverage of your flow with the flow tests you have available or even enforce a minimum % of test coverage in your org. If you wanted flow test to help enforce some good testing guidelines within your fellow admins and devs colleagues, forget about it.
It seems that flow tests were designed with the idea that they would help you avoid having to constantly run Debug. We have all been there, we make a small change to a flow, we select a record, run the debug again, it fails, try again, etc. That’s a use case the flow test is helpful, to replace a debug you keep having to re-configure constantly. This works well when you have an existing record to use in that environment.
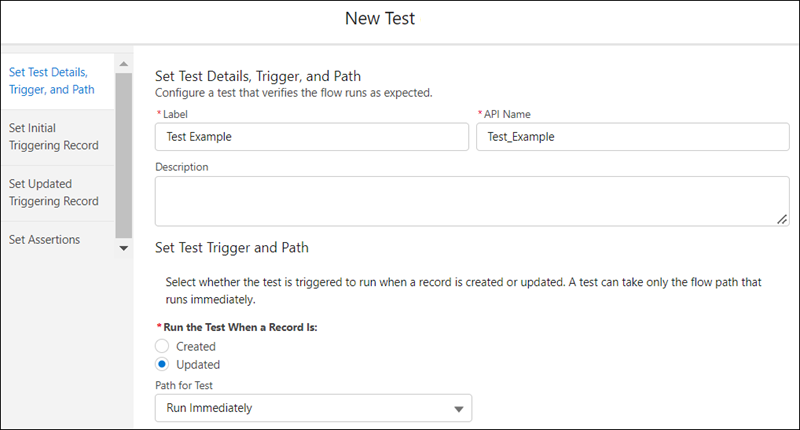
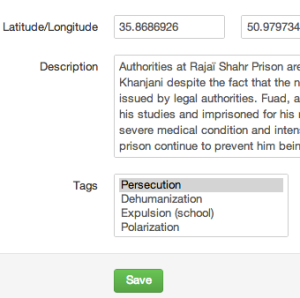
But it is quite bad once you start wanting to bring your flow test into your other environments and your scratch orgs: hardcoding record IDs into a flow test that goes on source control isn’t going to work. Flow test offers you the ability instead to create an initial record (Set Initial Triggering Record) or the subsequent updated record (Set Updated Triggering Record), which is somewhat a replacement to creating dummy records when writing your Apex unit tests. You can read the flow test docs to see how it works.
And that’s where all your real problems are starting. You can only create the triggering records from the object that originally triggered your record-triggered flow. But what if your object is tied with multiple lookups to other objects? And your flow needs those lookups to be filled? The UI doesn’t let you create those lookup records, you can only hardcode the record IDs, which is a no-go for deploying and testing across environments. So you can only use those flow test across multiple environments if your flow and your tests are really basic.
But where it does not work well at all, is when it comes to Person Accounts. While trying this in an environment with Person Accounts with a flow that is triggered by updates on the Account object, we encountered all kind of weird bugs such as
-The Account.PersonLeadSource input contains a field’s value that’s incompatible with the String data type.
Which is a field that was not even part of our Flow Test triggering records and that is not used at all in the environment.
In order to try to debug, you may pull the flow and the flow test metadata into your local project or package. Flow tests have their own XML metadata type format and end up within /force-app/main/default/flowtests/. Over there you could remove or update fields that are causing problems within the InputTriggeringRecordInitial and InputTriggeringRecordUpdated sections and manually push those flow test back into the org. But investigating those files, I realized why they never thought of Person Accounts when creating this feature: the RecordTypeId for the Person Account is hardcoded into the file. While that works in sandboxes for a single org (since those IDs are persistent across environment), this will never work into a package when installing across various scratch orgs or distinct orgs. You are better forgetting about Flow Test for Person Accounts as well.
I initially thought that Salesforce was finally adding some professionalism to flows, the ability to have tests that cover the major uses cases of your flow and ensure a new deployment into your environment or new updates to your flow does not accidentally create a new bug. Somewhat of a replacement to Apex Tests.
But it’s not that at all, it’s merely an improvement to the debug feature. And it’s fine if that is what you need, but we are still far from being able to fully replace Apex Classes and Apex Triggers on business critical features.
- The Considerations for Testing Flows documentation is a bit confusing because it mentions Flow tests don’t support flow paths that run asynchronously. However, the Winter 23 release notes mention Flow tests now support scheduled paths. Which I understand are 2 different things but within that context people might assume it might not work on a scheduled path. When you create the flow test, it also confusingly says A test can take only the flow path that runs immediately. However the UI does let you select a flow path that runs on a schedule. ↩︎


